If you’re searching for fresh inspiration, practical crafting techniques, and real creative ideas you can actually use, you’re in the right place. This article is designed to guide you through today’s most exciting crafting trends, hands-on methods, and artistic expression styles—while showing you how to turn simple materials into meaningful creations.
We explore the full artisan project journey, from the spark of an idea to the finishing details that make a piece truly stand out. Along the way, you’ll discover smart DIY material hacks, innovative approaches to texture and color, and spotlight-worthy project concepts that push creative boundaries without overwhelming your skill level.
Our insights are grounded in hands-on experimentation, trend tracking across the crafting community, and practical testing of tools and materials. That means you’re not just getting theory—you’re getting techniques that work. Whether you’re refining your craft or starting something new, this guide will help you create with confidence and originality.
From a Fleeting Idea to a Tangible Masterpiece
Every masterpiece starts as a whisper of an idea (usually at the worst possible time). The trick is turning that spark into structure. I recommend a repeatable framework for your artisan project journey: capture, clarify, create, complete.
- CAPTURE the idea immediately.
- CLARIFY the outcome you want.
- CREATE in small, scheduled sessions.
- COMPLETE by setting a deadline.
Some argue creativity should be spontaneous and unplanned. But structure doesn’t kill art; it FINISHES it. Think of it like storyboarding a film before shooting. Follow the steps, and momentum follows you.
Phase One: Capturing the Initial Creative Spark
Every great project begins with a flicker—that quiet, electric moment when something ordinary feels extraordinary. Inspiration (a sudden surge of creative insight) rarely arrives with fireworks. More often, it’s found in the curve of a leaf, the rhythm of city architecture, or a song lyric that hits like the perfect movie montage. Think of how a simple melody turned into a global anthem in “A Star Is Born”—small spark, massive impact.
To catch those sparks before they fade, build a simple toolkit:
- Mind maps – Visual diagrams that connect ideas around a central theme.
- Mood boards – Curated collections of images, textures, and colors that set emotional tone.
- Quick sketches – Fast, imperfect drawings that prioritize flow over polish (perfection can wait).
Next, define your vision. Ask yourself: What is the core message? Who is this for? What emotions should surface—nostalgia, rebellion, calm? Without clarity, ideas drift like half-finished Pinterest boards.
Then, choose your style. Realism captures life faithfully. Abstract bends it. Minimalist strips it down to essentials (sometimes less really is more).
Ultimately, this early stage shapes your entire artisan project journey. Treat it like the opening scene of your favorite film—set the tone right, and everything that follows feels inevitable.
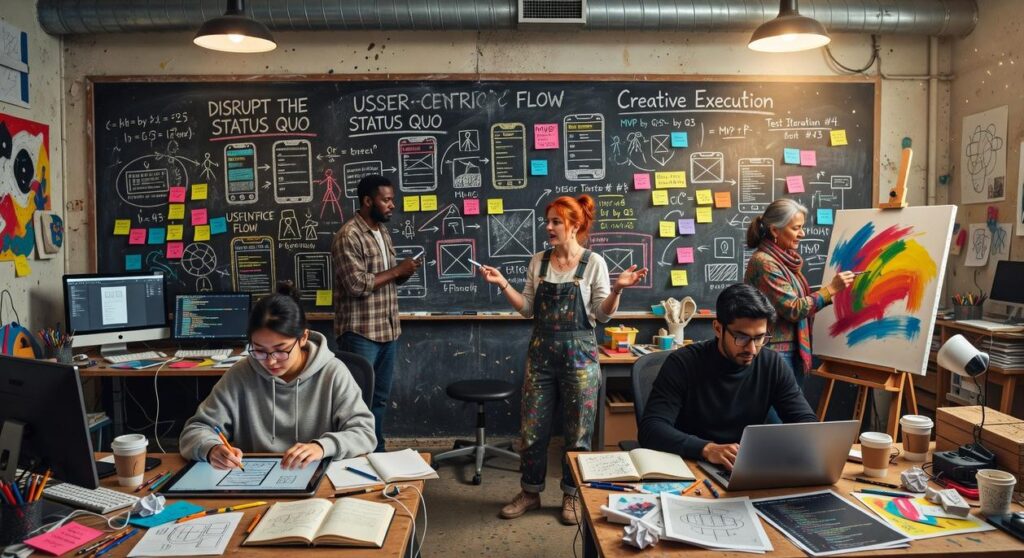
Phase Two: Assembling Your Creative Arsenal
Every great project begins with a choice: paint or pixels, clay or collage? Choosing the right medium is less about trends and more about alignment. Acrylics dry fast and favor bold, layered experimentation; oils blend slowly for nuanced depth (think Renaissance drama). Meanwhile, digital tools offer undo buttons and infinite brushes—convenient, but sometimes less tactile. If your vision thrives on texture, clay beats a stylus. If precision matters, a tablet may win. In short, match the material to both your concept and your workflow.
Next, consider DIY material hacks. Store-bought texture paste vs. homemade baking soda blends? The latter saves money and adds customization. New canvas vs. repurposed cardboard? One offers polish; the other offers character (and sustainability points). Pro tip: gesso can unify almost any surface before painting.
As you move along your artisan project journey, workspace setup becomes pivotal. A cluttered desk vs. an intentional layout can mean stalled ideas vs. seamless flow. Keep essentials within arm’s reach; store extras out of sight.
Finally, essential vs. extra: quality brushes and a reliable adhesive are must-haves. Specialty cutters shaped like stars? Fun, yes—necessary, rarely (unless you’re crafting like it’s a DIY episode of a home makeover show). Choose tools that serve the vision, not the impulse.
Phase Three: The Hands-On Process of Creation
Making the First Mark
The blank page isn’t intimidating because it’s empty. It’s intimidating because it’s possible. Many artists wait for confidence before they begin. That’s backward. Confidence follows action, not the other way around (yes, even for the pros).
Try this: set a five-minute timer and make the ugliest first mark you can. A scribble. A wash of muddy color. A crooked outline. This breaks what psychologists call activation paralysis—the freeze response when stakes feel high. Once something exists, you’re no longer starting. You’re responding.
Building in Layers
Forget the myth of the perfect first draft. Strong work is layered—broad strokes first, then refined structure, then detail. Think of it like cooking: you don’t plate garnishes before the base flavors develop.
Block in shapes. Establish base colors. Define light and shadow. Only then add texture and highlights. This stepwise approach mirrors classical atelier training methods (The Metropolitan Museum of Art notes layered underpainting as foundational in Renaissance practice).
If you need grounded inspiration, study inside a local artisan workshop tools techniques and inspiration and notice how process always precedes polish.
Navigating the “Messy Middle”
Here’s a contrarian take: if your piece looks terrible halfway through, that’s progress. The “messy middle” is structural tension before resolution. Self-doubt creeps in because your brain craves closure. Push anyway. Most abandoned projects die here—not from lack of talent, but impatience.
This stage defines the artisan project journey more than the final flourish.
The Power of the Pause
Stepping away isn’t weakness; it’s strategy. Cognitive research shows incubation improves problem-solving (Sio & Ormerod, 2009). Walk. Sleep. Return with sharper eyes.
Pro tip: stop slightly before you feel finished. You’ll come back eager—not drained.
Phase Four: Refining and Perfecting Your Work
Great art isn’t finished when you stop painting—it’s finished when you start evaluating. Self-critique means stepping back and assessing your work with fresh eyes (yes, even if you’re tired of looking at it). Ask yourself: Does the composition guide the viewer’s eye? Are the colors balanced or competing? Is the form believable and consistent?
Try this simple framework:
- Composition: Check focal points and spacing.
- Color: Compare light vs. dark values for contrast.
- Form: Refine edges and correct proportions.
Next, elevate your piece with subtle highlights, deeper shadows, and crisp details. Small adjustments often create dramatic impact (think of it as the director’s cut of your artisan project journey).
Finally, protect your work. Use appropriate varnishes for paint type, sealants for mixed media, and sturdy framing to prevent warping. Pro tip: Always test varnish on a scrap surface first. A flawless finish deserves lasting protection.
Sharing Your Artistic Voice with the World
You’ve completed your artisan project journey, and that’s no small feat. Many artists stall at the “almost done” stage (perfectionism is sneaky like that). Now comes the part that feels vulnerable: sharing.
Some argue your work isn’t “ready” yet. But growth happens in public. Feedback refines skill, and visibility builds confidence.
To share effectively:
- Choose one platform (social media, local exhibits, or community boards)
- Photograph your work in natural light for clarity
- Add a short story about your process
Pro tip: Ask viewers one specific question to spark engagement.
Then? Start sketching your next idea while momentum is on your side.
Keep Creating, Keep Growing
You came here looking for fresh creative buzz, practical crafting techniques, and inspiration to elevate your artisan project journey—and now you have the tools, trends, and ideas to make it happen.
We know the hardest part isn’t finding inspiration. It’s turning scattered ideas into finished pieces you’re proud to share. It’s pushing past creative blocks. It’s making your materials work for you instead of against you.
That’s why the next step matters.
Take one technique you discovered today and apply it to your next project. Experiment with a new material hack. Explore a different artistic expression style. Progress doesn’t come from waiting—it comes from creating.
If you’re ready to level up your skills, spark new ideas, and transform everyday supplies into standout art, dive deeper into our latest project spotlights and trending techniques. Join thousands of passionate makers who come to us for proven, practical inspiration.
Start your next piece today—and turn your creative spark into something extraordinary.
 Wesley Phamantons