
If you’re searching for safe, affordable, and eco-friendly ways to add color to your art projects, you’re in the right place. This guide explores exactly how to create and use homemade natural paints with simple ingredients you may already have at home. Whether you’re a DIY enthusiast, a parent looking for non-toxic options, or an artist curious about sustainable techniques, this article walks you through practical methods that actually work.
We’ve tested a wide range of natural pigments, binders, and application techniques to ensure the results are vibrant, long-lasting, and beginner-friendly. You’ll learn which materials produce the richest colors, how to improve paint consistency, and how to store your mixtures properly. By the end, you’ll have the confidence to craft your own custom palette—naturally, safely, and creatively.
Why Choose Paints from Nature?
As you experiment with vibrant pigments derived from everyday materials, you’ll discover how this creative process ties beautifully into understanding How Color Theory Shapes Artistic Expression, enhancing both your palette and your artwork.
First and foremost, safety is the headline benefit. Many conventional paints contain synthetic chemicals, solvents, and even trace heavy metals that can release volatile organic compounds (VOCs) into the air (EPA). In contrast, homemade natural paints made from eggs, flour, honey, soil, or spices dramatically reduce those risks. That means you can craft with kids or paint in a small apartment without worrying about harsh fumes lingering in the background.
Beyond safety, there’s something deeply rewarding about mixing your own pigments. When you grind berries for color or sift earth for tone, you’re not just painting—you’re collaborating with nature. As a result, your artwork feels more personal, almost alchemical (think less factory line, more cottagecore studio).
And then there’s cost. Store-bought art supplies add up quickly. Meanwhile, pantry staples and foraged finds keep expenses low while expanding your creative range. Pro tip: test small batches first to refine texture and hue before committing to a full project.
Your Natural Paint-Making Toolkit: Core Ingredients & Supplies
Making your own paint isn’t just charmingly old-school—it’s empowering. When you understand the building blocks, you gain creative control (and skip mystery ingredients).
The Pigment Sources (The Color)
Pigments are the fine powders that give paint its hue. Natural color falls into three main categories:
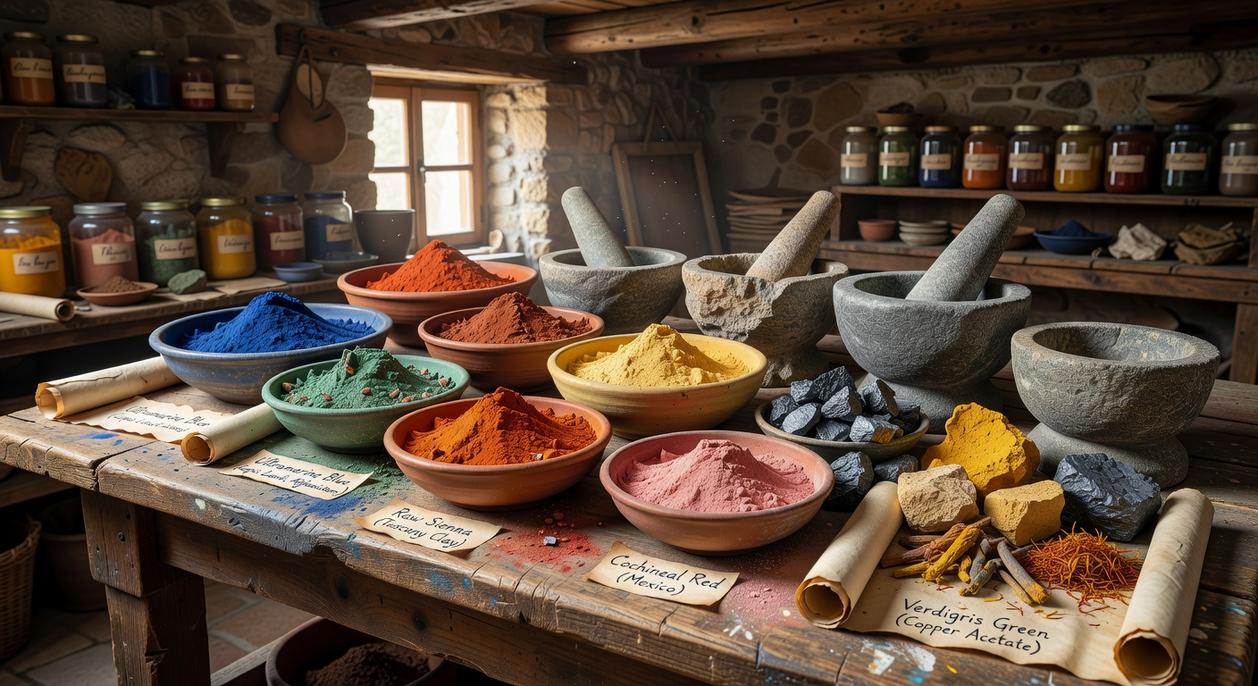
- Earth Pigments: Colored soils, clays, and crushed soft rocks like ochre. These are iron-rich minerals that create warm reds, yellows, and browns (used in cave art over 40,000 years ago, according to Smithsonian research).
- Botanical Pigments: Berries, flowers, spinach, beets, turmeric, and paprika. These offer vibrant but sometimes less lightfast color—beautiful for short-term projects.
- Mineral & Food Pigments: Charcoal for deep blacks, cocoa powder for soft browns, spirulina for green tones.
The benefit? You control intensity, texture, and even sustainability.
The Binders (The Glue)
A binder is the substance that holds pigment together and helps it stick to a surface.
- Egg Tempera: Egg yolk creates durable, luminous paint (Renaissance artists swore by it).
- Gum Arabic: Mixed with water and honey for watercolor-style flow.
- Flour & Water: Thick, opaque, and perfect for kids.
Some argue store-bought paints are easier—and sure, they’re convenient. But homemade natural paints teach technique, chemistry, and creativity in one go.
Essential Tools
- Mortar and pestle (or bowl and spoon)
- Small mixing jars
- Brushes
- Watercolor paper
Pro tip: Grind pigments finely—the smoother the powder, the smoother your paint.
First Recipe: Creating Rich Earth Paints from Soil and Clay
Creating your own pigments from the ground beneath your feet is surprisingly simple—and deeply satisfying (it’s basically prehistoric Pinterest).
Step 1: Sourcing Your Pigment
Look for naturally colored soils and clays in your area: reds, yellows, siennas, and deep browns. Check riverbanks, construction sites (with permission), or exposed earth after rain. Choose CLEAN, chemical-free locations away from roads or industrial runoff. Ethical sourcing means taking small amounts and leaving the landscape undisturbed.
• Bring gloves and small containers
• Label each color
• Test a pinch with water to preview the hue
Step 2: Processing the Earth
Spread soil on a tray and let it dry completely. Crush clumps with a mortar and pestle, then sift through a fine mesh. The finer the powder, the smoother your paint—this DIY hack makes a HUGE difference in texture.
Step 3: Mixing Your Paint
Combine one part pigment powder with one part egg yolk. Add a few drops of water until smooth. That’s it—Use homemade natural paints for earthy, archival results (egg tempera dates back to ancient Egypt; see The Met Museum).
For more hacks, explore budget friendly ways to stretch your art supplies.
From garden beds to kitchen cabinets, vibrant color is closer than you think. Let’s start simple.
The Power of Spices
First of all, spices are the easiest entry point. Turmeric yields a bold golden yellow, while paprika offers warm rust tones (yes, your curry can double as art supplies). To make a quick watercolor-style paint, mix 1 tablespoon of turmeric or paprika with 1 teaspoon of gum arabic and just enough water to form a smooth paste. Gum arabic—a natural tree sap used as a binder—helps pigment stick to paper, much like it does in traditional watercolors (Smithsonian Magazine notes its centuries-long use in art).
Extracting Color from Plants
Meanwhile, berries and vegetables provide liquid dyes. Simmer crushed blackberries, raspberries, or chopped beets in a small amount of water for 15–20 minutes. Strain to create a concentrated color.
Mixing Botanical Paint
Next, combine the cooled concentrate with gum arabic. These homemade natural paints may be less lightfast—meaning they fade over time—so they’re best for sketchbooks or scanned artwork. Looking ahead, it’s reasonable to speculate that eco-conscious artists will increasingly embrace botanical palettes as sustainability trends grow.
Storing and Playing With Color
Natural paints feel alive. When you mix homemade natural paints with egg yolk or crushed petals, you will notice the earthy scent and silky drag of the brush. Because they spoil quickly, make small batches and store leftovers in the refrigerator for a few days. Add more water for a transparent wash, less for a thick, gouache-like layer that dries with a soft chalky finish. Layer colors slowly; listen to the faint scratch as bristles glide, watch tones bloom and deepen. Keep a swatch journal to record textures, ratios, and the MOST surprising pigment discoveries. Trust your senses every time.
Bring Your Creative Vision to Life with Homemade Natural Paints
You came here looking for a more meaningful, creative, and sustainable way to paint — and now you know exactly how homemade natural paints can transform your artistic process. From safer ingredients to richer textures and earthy pigments, you’ve seen how simple materials can solve the frustration of harsh chemicals, limited color control, and expensive store‑bought options.
Creating your own paints isn’t just a craft trend — it’s a way to take full ownership of your art. No more settling for synthetic blends that don’t match your vision. No more worrying about what’s really in your materials. You now have the knowledge to mix, experiment, and design with confidence.
The next step is simple: gather your base ingredients, test your first small batch, and start experimenting today. If you’re ready to elevate your DIY art game, explore more step‑by‑step techniques and artist‑tested hacks trusted by thousands of passionate crafters who are redefining what handmade really means.
Your creativity deserves materials as authentic as your ideas. Start mixing, start painting, and turn your inspiration into something beautifully your own.
 Zayric Xenvale is the kind of writer who genuinely cannot publish something without checking it twice. Maybe three times. They came to artistic expression styles through years of hands-on work rather than theory, which means the things they writes about — Artistic Expression Styles, Specialty Reads, LWMF Artisan Project Spotlights, among other areas — are things they has actually tested, questioned, and revised opinions on more than once.