I know what it’s like when you want to do something creative with your family but everyone’s at different skill levels.
You’re searching for craft ideas that won’t bore your teenager while your six-year-old is still figuring out scissors. And you definitely don’t want to spend an hour hunting down supplies at three different stores.
Here’s the thing: the best family craft time happens when you work with what you already have. Your junk drawer probably holds more potential than you think.
I’ve tested dozens of projects with families who have kids ranging from toddlers to teens. The ones that work best? They’re simple to start but flexible enough that everyone can make them their own.
This guide gives you projects that actually bring people together. No fancy supplies. No pressure to make something Instagram-perfect.
We focus on the process at playful crafts lwmfcrafts. That means projects where mess is expected and creativity matters more than following directions exactly.
You’ll find step-by-step ideas using stuff like cardboard boxes, old magazines, and whatever’s in your kitchen drawer. Each project works for mixed age groups because they scale up or down based on who’s crafting.
No trips to the craft store required. Just you, your family, and whatever’s already in your house.
Upcycled Masterpieces: Art from the Recycling Bin
Your recycling bin is sitting there right now.
Full of what most people call trash.
But I see something different. I see free art supplies that can keep kids busy for hours while teaching them something that actually matters.
Some folks will tell you that real art requires real materials. That you need to buy proper supplies from the craft store or you’re wasting your time. They think recycled projects look cheap and aren’t worth the effort.
I disagree.
The best projects I’ve seen come from stuff people almost threw away. And here’s the bonus: kids learn that creativity doesn’t require a credit card.
Let me show you three projects that turn your recycling into actual art.
Cardboard Tube Critters & Castles
Toilet paper rolls and paper towel tubes are GOLD.
You can cut them into rings to make caterpillars. Slice one end into strips and curl them outward for octopus tentacles. Stack them with glue to build castle towers that actually stand up.
The technique is simple. Cut with scissors (younger kids might need help). Glue pieces together with regular white glue. Paint with whatever you have.
I’ve watched a six-year-old turn four tubes into a dragon that she kept on her shelf for months.
Plastic Bottle Terrariums & Planters
This one works better for kids who can handle scissors safely.
Take a clear plastic bottle and cut it in half (adults should do this part for younger kids). The bottom becomes a planter. Poke drainage holes with a heated nail or drill bit. Decorate the outside with permanent markers or acrylic paint.
Fill it with soil and small plants like succulents or herbs. You’ve just combined art with a living science experiment.
The clear plastic lets kids watch roots grow. It’s like those fast crafts lwmfcrafts projects but with an educational twist that keeps giving.
Pro tip: Use the top half as a humidity dome by inverting it over the bottom. Instant mini-greenhouse.
Magazine & Newspaper Collage Landscapes
This project teaches color theory without feeling like school.
Flip through old magazines and newspapers. Rip or cut out sections based on color and texture. No pictures needed, just patches of blue, green, brown, whatever catches your eye. As you dive into the world of creative expression, let your imagination run wild with Lwmfcrafts, transforming snippets of color and texture from old magazines into a vibrant tapestry of personal art. As you dive into the world of creative expression, let your imagination run wild with Lwmfcrafts, transforming snippets of color and texture into a vibrant tapestry that reflects your unique artistic vision.
Now build a landscape. Blue pieces become sky. Green scraps turn into grass or trees. Brown bits make mountains or dirt.
The torn edges create texture that you can’t get with paint. Layer pieces to add depth. A darker blue behind a lighter blue makes the sky look real.
Kids who say they “can’t draw” suddenly realize they CAN create playful crafts Lwmfcrafts style art. They’re just using different tools.
The mess is minimal. The results look surprisingly sophisticated. And you just cleared out that magazine pile that’s been sitting around since last year.
Nature’s Canvas: Crafts Inspired by the Outdoors
You know that moment when your kid picks up a stick and suddenly it’s a magic wand?
That’s the energy we’re going for here.
I want you to think about your next craft session differently. Instead of running to the store for supplies, you’re going to step outside and let nature do the shopping for you.
Here’s what I mean. Most people see crafting as an indoor thing. Glue guns and glitter on the kitchen table. But some of the best materials are literally sitting in your backyard right now.
Let me show you three projects that prove it.
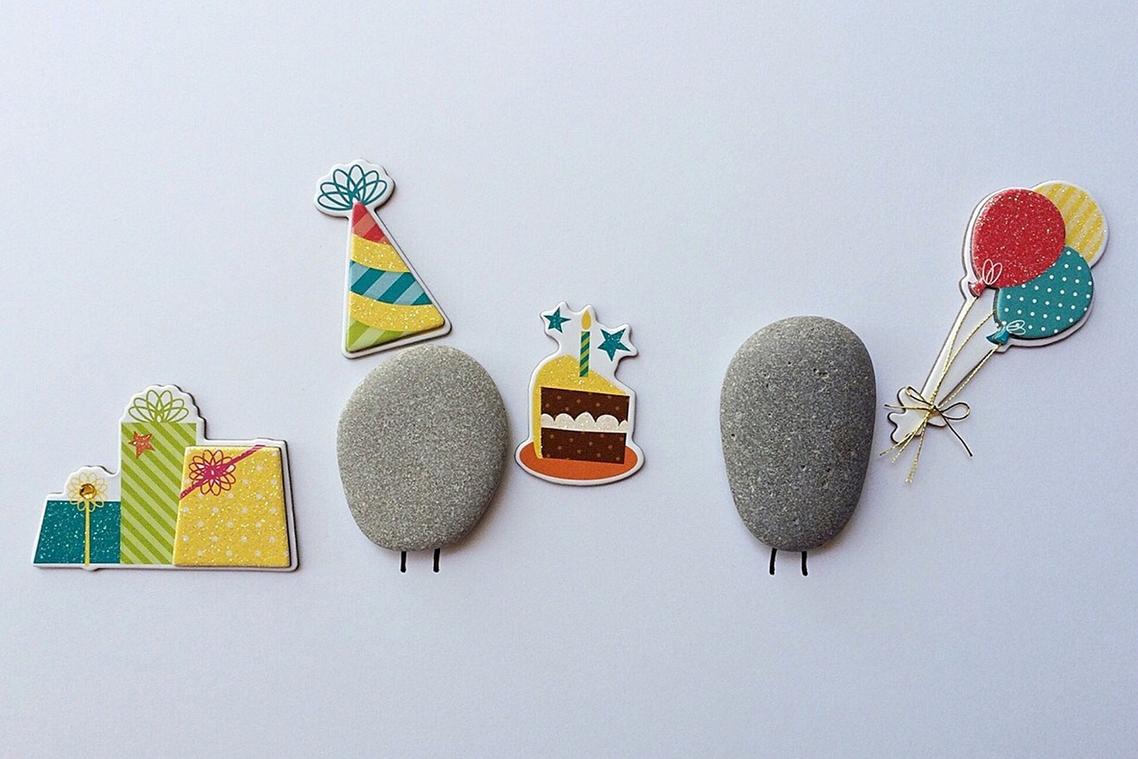
Project 1: Painted Story Stones
This one’s been making the rounds at lwmfcrafts circles for good reason.
You start with smooth stones. The kind you find near streams or in your garden. Clean them off and let them dry completely.
Now here’s where it gets fun. Paint simple characters on each stone. A dragon. A castle. A tree. A person. Keep the designs basic so kids can recognize them instantly.
Once they’re dry, toss them in a bag. Pull out three or four stones at random and build a story around whatever you picked. It’s like story dice but way more personal because you made them yourself.
Project 2: Leaf Rubbing & Watercolor Prints
This is the classic you probably remember from school.
But I’m going to give you a twist that makes it way more interesting.
Place a leaf under a piece of paper. Rub over it with a crayon until the veins and edges show through. That’s the standard version.
Now grab watercolors and paint right over your crayon rubbing. The wax resists the water and suddenly you’ve got this beautiful contrast effect. The leaf stays bright while the background blooms with color.
It’s the difference between a simple rubbing and an actual piece of art you’d want to frame.
Project 3: Twig & Stick Mobiles or Sculptures
This is where things get three dimensional.
Collect twigs of different sizes. You want some straight ones and some with interesting bends or branches.
You’ve got two paths here. Build a mobile by tying twigs together with yarn to create a hanging structure. Or go the sculpture route and glue them into standing figures.
I’ve seen kids make everything from abstract shapes to recognizable animals. One parent told me her daughter built an entire stick family and gave them all names.
The point is to let imagination drive the construction. There’s no wrong way to connect sticks together.
Kitchen Cabinet Creations: Art with Household Staples
You know that feeling when inspiration hits but your art supplies are nowhere to be found?
Your kitchen has you covered.
I’m serious. The same ingredients you use for dinner can turn into inventive lwmfcrafts that look like they came from an actual art store.
Think of your pantry like a painter’s palette. Except instead of tubes of paint, you’ve got flour and salt waiting to become something completely different. As you explore the culinary possibilities of your pantry, let your creativity flow like a master gamer crafting unique strategies, turning everyday ingredients into Inventive Lwmfcrafts that elevate your meals to an art form. As you unleash your culinary creativity, think of each dish as an opportunity for Inventive Lwmfcrafts that transform the ordinary ingredients in your pantry into extraordinary gastronomic experiences.
Homemade Puffy Paint
This one’s almost too easy.
Mix equal parts flour, salt, and water until you get a smooth paste. Add food coloring. That’s it.
Paint your design on thick cardboard or paper. Once you’re done, pop it in the microwave for about 10 to 20 seconds (watch it closely). The paint puffs up like magic. It’s basically chemistry meets art, and kids lose their minds over it. I expand on this with real examples in Light Crafts Lwmfcrafts.
The texture ends up somewhere between foam and frosting. Totally different from regular paint.
Salt Dough Ornaments & Sculptures
Here’s where things get serious.
Salt dough is like clay’s more accessible cousin. You can make ornaments that last for years, not just a weekend.
The recipe: two cups flour, one cup salt, one cup water. Knead it until smooth. Roll it out and cut shapes or sculpt by hand.
Bake at 200°F for two to three hours depending on thickness. Once cool, paint them however you want.
I’ve seen people make everything from holiday decorations to jewelry. The dough dries hard as rock and holds detail surprisingly well.
These playful crafts lwmfcrafts don’t require a trip to the store. Just raid your cabinets and start making.
Tips for a Fun & Stress-Free Craft Session
Look, I’m not going to sugarcoat it.
Crafting with kids can turn your dining table into what looks like a glitter bomb explosion. I’ve seen it happen more times than I can count.
But here’s what most parenting blogs won’t tell you. The mess isn’t the real problem. It’s the stress of feeling unprepared that makes everything fall apart. The ideas here carry over into Indoor Activities Lwmfcrafts, which is worth reading next.
Some people say the solution is to just avoid messy crafts altogether. Stick to coloring books and call it a day. And sure, that keeps your house clean.
But you know what you’re missing? The actual joy of creating something together. The experimentation. The weird combinations that somehow work.
I’ve watched hundreds of craft sessions (both the disasters and the wins), and I can tell you exactly what separates the two.
It’s all about the setup.
Embrace the Process
Here’s the thing about perfection. Kids don’t care about it. They want to squeeze glue bottles and see what happens when you mix three colors of paint.
A study from the American Academy of Pediatrics found that process-based creative activities reduce stress in both children and adults by up to 75%. That’s not nothing.
So forget the Pinterest-perfect outcome. Focus on the doing.
Set up your space before you start. Cover your table with newspaper or a plastic tablecloth. Get a tray and load it with everything you need. Scissors, glue, paper, whatever you’re using for your playful crafts lwmfcrafts session.
When everything’s within reach, you’re not scrambling mid-project.
Simple Cleanup Hacks
This is where you save yourself.
Keep these ready:
- A lint roller for glitter (works better than vacuuming)
- A bowl of warm soapy water for sticky fingers
- Baby wipes for quick surface cleanups
I learned the lint roller trick after finding glitter in my hair three days after a craft session. It changed everything.
The soapy water bowl? That’s for constant hand-dipping. Kids touch their faces. A lot. Having clean hands available means less paint on your couch. To ensure a fun and mess-free crafting experience for the kids while keeping their hands clean, I always recommend incorporating the Fast Crafts Lwmfcrafts method, which emphasizes the importance of regular hand-dipping in soapy water to minimize paint mishaps on the couch. To ensure a fun and mess-free crafting experience for the kids while keeping their hands clean, I always recommend incorporating the Fast Crafts Lwmfcrafts, which provide an engaging way to explore creativity without the worry of paint-stained furniture.
Does this take five minutes of prep? Yes. Does it save you thirty minutes of cleanup and a minor breakdown? Also yes.
Making Memories, One Project at a Time
You wanted simple ways to fill an afternoon with creativity. Now you have them.
No more scrambling for complex activities or spending money on expensive entertainment kits. The stress of keeping everyone engaged just got easier.
The truth is, the best projects use what you already have at home. When you transform everyday items into art, you’re doing more than filling time. You’re building memories and sparking imagination in ways that matter.
Here’s what I want you to do: Pick one project from this list right now. Grab your supplies and get started.
Your family’s next creative adventure is waiting. And it doesn’t require anything fancy.
The playful crafts lwmfcrafts approach has always been about making art accessible. You don’t need special skills or a big budget. You just need to start.
So go ahead. Choose your project and see what happens when you give creativity some space to breathe.
 Zayric Xenvale is the kind of writer who genuinely cannot publish something without checking it twice. Maybe three times. They came to artistic expression styles through years of hands-on work rather than theory, which means the things they writes about — Artistic Expression Styles, Specialty Reads, LWMF Artisan Project Spotlights, among other areas — are things they has actually tested, questioned, and revised opinions on more than once.