I know what it’s like when the kids are restless and you’re out of ideas.
You need activities that actually work. Something that keeps everyone engaged without turning into a screen time marathon. But finding projects that deliver? That’s the hard part.
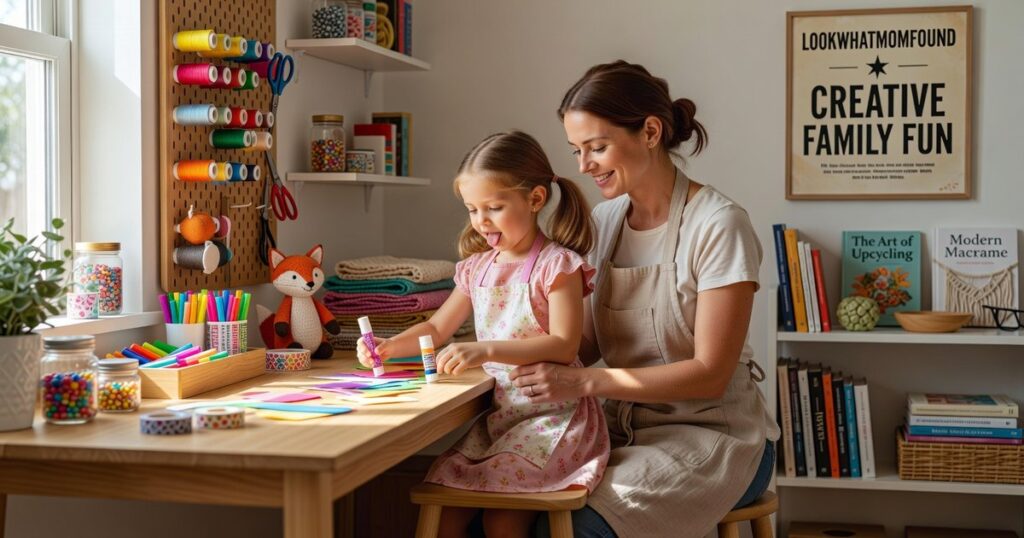
LWMF Crafts has been testing family activities for years. We’ve tried hundreds of projects with real families to see what actually sparks joy and what falls flat.
This guide pulls together the best creative activities from LookWhatMomFound. The ones that turn ordinary afternoons into something special.
We’re not throwing random craft ideas at you. Every project here has been tested in real homes with real kids (and real messes). We know which ones work because we’ve seen them succeed.
You’ll find activities that use materials you already have. Projects that bring families together instead of driving them apart.
No complicated instructions or impossible supply lists. Just proven ideas that create those moments you’ll actually remember.
Upcycled Masterpieces: Everyday Items, Extraordinary Art
Last Tuesday, my kid asked if we could buy one of those fancy castle kits from the craft store.
You know the ones. Forty bucks for pre-cut foam pieces and some glitter glue.
I looked at the recycling bin sitting by the door. Cardboard tubes from paper towels. A couple of old cereal boxes. Some bottle caps we’d been saving.
“We can make something better,” I told her.
She didn’t believe me at first.
Here’s what most people get wrong about crafting. They think you need expensive supplies to make something worth keeping. That real art requires trips to specialty stores and a credit card that can handle it.
I used to think that too.
But the whole philosophy behind lwmfcrafts creative activities from lookwhatmomfound changed how I see household trash. That cardboard tube isn’t garbage. It’s a tower waiting to happen.
Let me show you how we built that castle.
The Cardboard Roll Castle Project
Grab your paper towel tubes and toilet paper rolls. You’ll need about six of them, but honestly, use whatever you’ve got.
Cut the tops of two tubes into battlements. Those little notched edges that make it look like an actual castle wall. Scissors work fine but a craft knife is faster (just watch your fingers).
Take a cereal box and cut out a base. Something sturdy enough to hold everything together.
Now here’s the trick I learned. Mix equal parts white glue and water in a small bowl. Brush this mixture over your cardboard pieces. It soaks in and when it dries, your castle becomes way more durable. Almost like papier-mâché but without the mess.
Pro tip: Do this step outside or on a surface you don’t care about. The glue-water mix drips more than you’d think.
While that dries, cut small rectangles from an old magazine for windows. Or draw them with marker. Whatever feels right.
Glue your towers to the base. Add bottle caps as turrets. We used old magazine pages rolled tight for flags.
My daughter painted hers with leftover wall paint from the garage. Yours might stay natural cardboard brown. Both look good. Whether your child opts for a vibrant splash of color like my daughter’s creation with leftover wall paint or embraces the charming simplicity of natural cardboard brown, both styles shine in their own way, much like the creativity inspired by Lwmfcrafts. Whether your child’s masterpiece is inspired by my daughter’s vibrant wall paint or sticks to the classic natural cardboard brown, both creations can find a place in the imaginative world of Lwmfcrafts, where creativity knows no bounds.
The whole thing cost us nothing and took maybe an hour.
She still has it on her shelf three months later. That forty-dollar kit would’ve been built and forgotten by now.
Sensory Play for Little Explorers: Process Over Product
Your toddler just squeezed paint all over the table.
Again.
And you know what? That’s exactly what should happen.
I’m talking about process art. It’s where the mess is the point. Where there’s no finished product to frame or show grandma. Just pure exploration.
Think of it this way. When your three-year-old mixes colors until everything turns brown, they’re not ruining anything. They’re learning cause and effect. They’re building fine motor skills. They’re figuring out what happens when blue meets yellow.
No pressure. No perfect outcome.
Here’s what makes this different from regular art projects. There’s no template to follow. No example to match. Your kid can’t mess it up because there’s nothing to mess up.
Let me show you something we do at lwmfcrafts that kids go crazy for.
Homemade Puffy Paint.
The recipe is dead simple. Mix equal parts shaving cream and white glue in a bowl. Add a few drops of food coloring. That’s it.
But here’s where it gets good.
The texture alone keeps little hands busy for ages. It’s fluffy and thick and completely different from regular paint. Kids can squish it between their fingers. They can watch how it holds its shape on paper (it actually puffs up as it dries).
Give them options for applying it. Fingers work great. So do brushes or cotton swabs. Each tool creates a different sensory experience.
Watch what happens when they mix colors directly on the paper. Red and yellow become orange right before their eyes. They’re not just making art. They’re conducting experiments.
The best part? You’re not hovering over them fixing mistakes. Because there aren’t any mistakes to fix.
Seasonal Celebrations: Crafting Through the Calendar

Last October, my daughter came home from school upset because all her friends were planning elaborate Halloween decorations and she felt like we were behind.
I get that panic. You want to create those special moments but you’re already juggling work and dinner and everything else.
That’s when I realized something. You don’t need Pinterest-perfect setups or expensive craft store hauls. You just need projects that fit the season and actually work.
Some parents say seasonal crafts are too much pressure. They argue that kids don’t really care about themed activities and you’re just adding stress to your plate.
Fair point. I’ve definitely overdone it before.
But here’s what changed my mind. When you have the right project at the right time, it doesn’t feel like work. It feels like building something that sticks. Engaging in Creative Activities Lwmfcrafts not only ignited my passion for building but transformed the process into a joyful journey that felt more like a rewarding adventure than mere work. …like a canvas where my imagination could run wild, proving that engaging in Creative Activities Lwmfcrafts can truly elevate the gaming experience to new heights.
Fall: Pressed Leaf Suncatchers
We started with a simple nature walk in late September. The goal was just to collect leaves in different colors (reds, oranges, yellows).
Back home, we pressed them between book pages for about a week. Then we sandwiched them between two pieces of contact paper and hung them in the window. Lwmfcrafts Fun Crafts by Lookwhatmomfound picks up right where this leaves off.
The sunlight coming through those autumn colors? Worth every minute.
Winter: DIY Salt Dough Ornaments
This one became our December tradition. The recipe is dead simple: This connects directly to what I discuss in Activities Brought to You by Lookwhatmomfound Lwmfcrafts.
• 2 cups flour
• 1 cup salt
• 1 cup water
Mix it together, roll it out, and let the kids use cookie cutters. We bake them at 250°F for about two hours until they’re hard.
Once they cool, paint and glitter become the main event. My kids go wild with it (and yes, glitter ends up everywhere).
Here’s the trick I learned from inventive lwmfcrafts. After decorating, seal them with clear varnish. Two coats if you can manage it.
Those ornaments last for years. We still hang ones from three Christmases ago.
The varnish keeps them from crumbling or absorbing moisture, which means they actually survive storage between seasons.
The Artisan Challenge: Advanced Projects for Older Kids & Teens
Let’s be honest.
Finding craft projects for teens is brutal. Everything either feels too babyish or so complicated they give up after five minutes.
I’ve watched countless parents struggle with this. Their older kids want something that feels grown up but doesn’t require a degree in fine arts.
Here’s what most craft guides get wrong. They assume teens want the same stuff as younger kids, just with bigger pieces. Or they swing too far the other way and suggest projects that need specialty equipment and hours of practice.
The truth? Teens want something that looks professional without being impossible.
That’s where DIY marbled mugs come in.
This project hits different because the results actually look store bought. Your teen can make something they’ll genuinely use or gift without feeling embarrassed about it.
What you’ll gain from this project:
- A finished product that looks expensive and personalized
- Skills that translate to other surface decoration techniques
- Something functional they can show off at school or give as gifts
The technique itself comes from creative activities lwmfcrafts has been teaching for years. It uses nail polish and water to create those swirled patterns you see on high end ceramics.
Here’s how the marbling works.
Fill a container with room temperature water (not cold, not hot). Drop different colors of nail polish onto the surface. The polish will spread and float. Use a toothpick to swirl the colors together, then dip your mug through the design in one smooth motion.
The water temperature matters more than you’d think. Too cold and the polish clumps. Too hot and it disperses too fast.
After dipping, let the mug dry completely for 24 hours. Then seal it with a clear acrylic spray so it’s actually usable.
The best part? This taps into the whole personalized gift trend without spending $30 at some boutique shop. Your teen can make birthday presents that friends actually want to keep. By embracing the creative potential of Inventive Lwmfcrafts, your teen can design unique birthday gifts that not only reflect their friends’ personalities but also stand out as heartfelt treasures amidst the sea of generic store-bought options. By exploring the creative possibilities of Inventive Lwmfcrafts, your teen can transform everyday materials into heartfelt gifts that resonate with their friends and stand out in a sea of store-bought options.
Your Next Family Adventure Awaits
You know that feeling when the kids are staring at screens and you’re scrambling for something better to do.
I get it. Finding activities that work for everyone in the family shouldn’t feel like a second job.
That’s why I put together this collection of lwmfcrafts creative activities from lookwhatmomfound. Real projects that actually keep kids engaged without breaking the bank.
You came here looking for ways to beat the boredom. Now you have options that work for every age group.
These activities aren’t just busy work. They’re about making things together and creating moments that stick with your family.
The best part? They don’t require fancy supplies or hours of prep time.
Pick one project to try this weekend. Just one. See what happens when you give your family something to create instead of consume.
Browse our site for more ideas when you’re ready. We’ve got techniques and trends that’ll keep your creative momentum going.
Your family’s next memory is waiting to be made.
 Zayric Xenvale is the kind of writer who genuinely cannot publish something without checking it twice. Maybe three times. They came to artistic expression styles through years of hands-on work rather than theory, which means the things they writes about — Artistic Expression Styles, Specialty Reads, LWMF Artisan Project Spotlights, among other areas — are things they has actually tested, questioned, and revised opinions on more than once.