If you’re searching for fresh ways to elevate your artwork, explore new textures, or push beyond traditional boundaries, this guide to mixed media art techniques is designed with you in mind. Artists today want more than step-by-step instructions—they want inspiration, practical hacks, and techniques that actually work in real creative spaces.
In this article, you’ll discover how to layer materials effectively, combine unexpected mediums, and experiment with surfaces to create depth and visual impact. We’ll break down trending approaches, essential tools, and smart DIY material swaps that help you create stunning results without overspending.
Our insights are grounded in hands-on crafting experience, trend research across the art community, and practical testing of materials and methods. Whether you’re refining your style or just starting to experiment, this guide will give you clear, actionable techniques to confidently expand your artistic expression.
Beyond the Canvas: Redefining Your Artistic Boundaries
If your studio routine feels predictable, it probably is. I believe comfort is the enemy of compelling art (yes, even when it pays the bills). Instead of defaulting to paint and paper, try pushing mixed media art techniques into unfamiliar territory.
- Embed fabric, resin, or found metal for texture that demands touch.
- Transfer digital glitches onto wood panels for a subtle tech-meets-tactile clash.
Some argue experimentation dilutes focus. I disagree. Cross-pollination fuels originality—Basquiat proved that decades ago. Pro tip: limit your palette when expanding materials to avoid chaos. Trust the mess; refine later.
Digital Alchemy: Merging Pixels with Pigment
There’s something deliciously rebellious about dragging a digital file out of your screen and smearing it into the physical world. Like teaching your printer and paintbrush to be friends (they were rivals in art school).
Gel Medium Transfers
A gel medium transfer is a method of moving a laser-printed image onto another surface by bonding ink to acrylic gel and rubbing away the paper. Think of it as a tattoo for wood, canvas, or fabric—minus the regret.
Step-by-step:
- Print your image with a laser printer (inkjet will ghost you).
- Brush an even coat of gel medium onto your surface.
- Press the image face-down and let it dry fully.
- Dampen the paper and gently rub it away.
What remains is a transparent, weathered image—perfect for that antique attic vibe (even if you live in a studio apartment).
DIY Decal Paper
Water-slide decal paper lets you print intricate designs and slide them onto curved surfaces like pottery or sculpture. So yes, your ceramic owl can finally wear tiny Victorian wallpaper. Seal it with varnish to protect the print—because even art deserves sunscreen.
Integrating Digital Collage
Print sections of a digital composition and embed them into paintings using acrylics and gels. Blend edges with glazes, add texture paste, then seal. This fusion of mixed media art techniques creates depth that feels both intentional and a little magical.
Augmented Reality Layers
Embed a subtle QR code linking to animation or sound. Some purists argue tech distracts from “real” art. But art has always evolved—oil paint was once the new kid too (and look how that turned out).
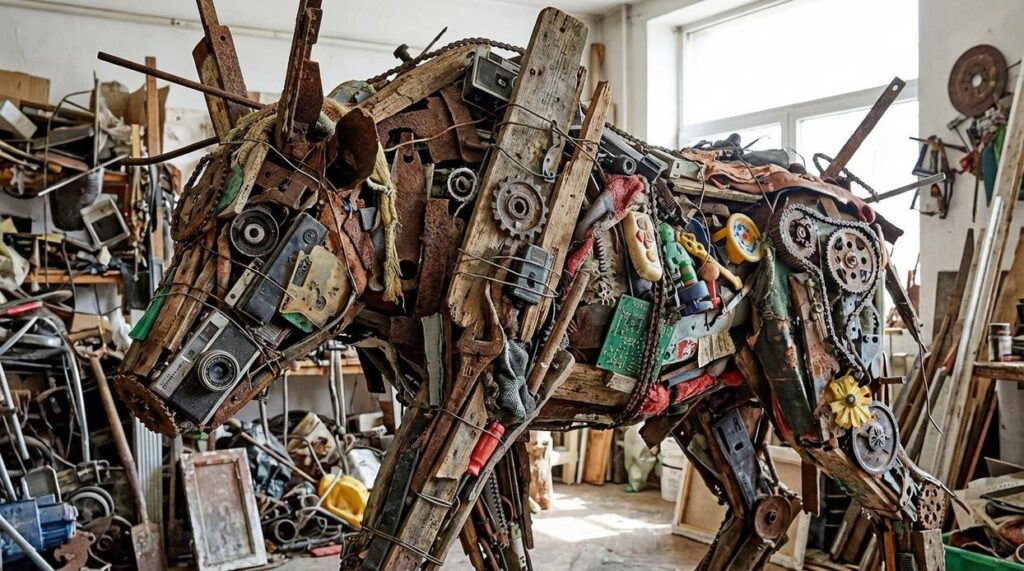
The Art of Deconstruction: Found Objects & Upcycled Materials
Deconstruction isn’t just tearing things apart—it’s reimagining what they can become. At its core, upcycling means transforming discarded materials into something more valuable or expressive. And the payoff? You get distinctive textures, lower material costs, and artwork that literally carries layers of history.
Structural Packaging as Sculpture
First, move beyond the basic cardboard collage. Molded plastic packaging, styrofoam, and bubble wrap can act as structural foundations rather than filler. Their built-in curves and compartments create instant dimension (no expensive armatures required). As a result, your compositions gain depth and shadow play that flat paper simply can’t achieve. Some critics argue these materials look “cheap.” However, when thoughtfully arranged and sealed with gesso or resin, they become bold architectural elements—proof that presentation changes perception.
E-Waste Assemblage
Next, consider old keyboards, circuit boards, and wires. E-waste assemblage—art made from discarded electronics—offers intricate patterns you’d spend hours trying to replicate by hand. Carefully disassemble pieces using small screwdrivers and gloves for safety. The benefit? Hyper-detailed, futuristic surfaces perfect for mixed media art techniques. (Think sci-fi set design, but on your canvas.)
Melted & Molded Plastics
With a heat gun, you can gently warp plastic bags or bottles into organic forms. Proper ventilation is essential, but the reward is sculptural movement that feels almost alive. In contrast to store-bought embellishments, these shapes are completely one-of-a-kind.
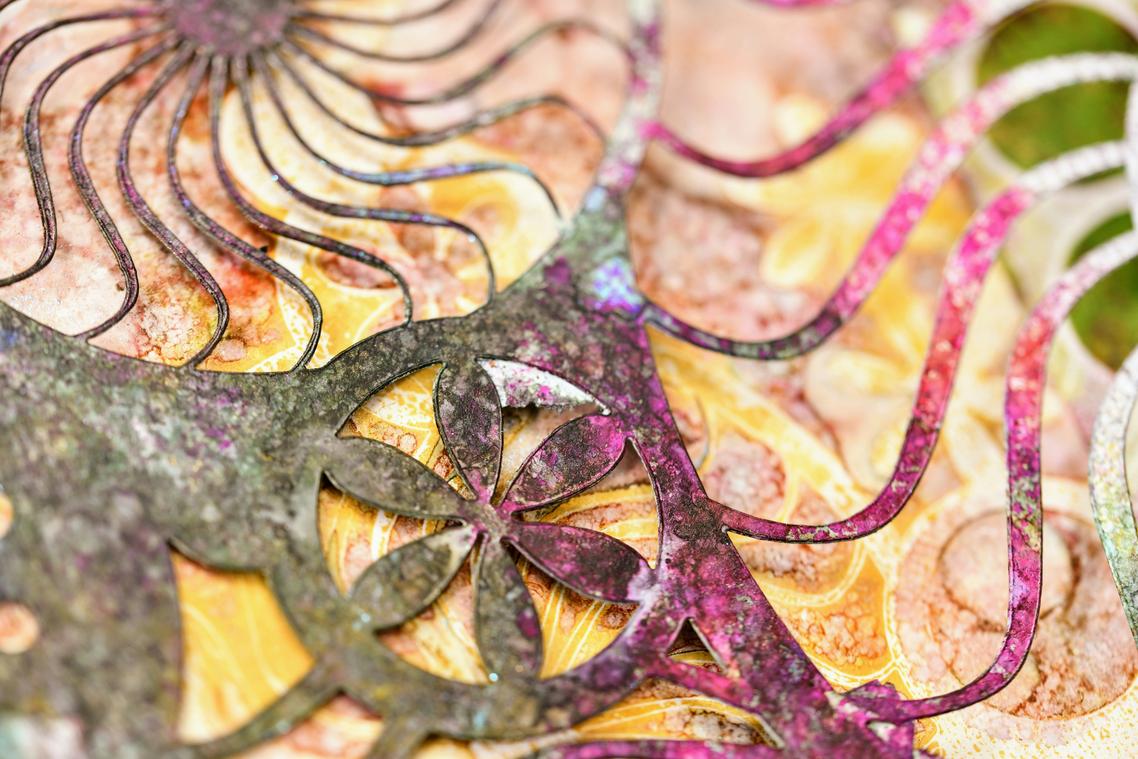
Rust & Patina as a Medium
Finally, create authentic rust effects using an iron-vinegar solution. This DIY patina adds industrial character and emotional weight—aging your work in hours instead of decades. The result? Art that feels discovered, not just made.
Textural Dimensions: Weaving Fabric and Fiber into Your Work
Back in 2020, when many artists were confined to home studios, experimentation with texture surged—and for good reason. Flat surfaces suddenly felt limiting.
Paper & Canvas Embroidery
Stitching onto heavy watercolor paper or primed canvas involves piercing the surface with a needle to create decorative thread lines. Think of it as drawing with fiber instead of ink. Some critics argue this weakens the substrate. Fair point—too many holes can cause tearing. However, after three months of testing different paper weights, 300gsm and above holds up beautifully (especially when pre-punched with an awl). For foundational skills, revisit this step by step guide to mastering hand embroidery patterns.
Fabric Sculpting with Stiffeners
Fabric stiffener is a liquid solution that hardens cloth into rigid form once dry. Commercial versions use synthetic binders, while DIY mixes often rely on PVA glue or cornstarch. Skeptics say stiffened fabric looks artificial. Yet when layered gradually and shaped by hand, it can mimic bark, shells, even windswept clothing (very superhero cape energy). Allow 24–48 hours drying time for structural integrity.
Weaving with Unconventional Materials
Weaving interlaces vertical warp and horizontal weft fibers. Why limit yourself to yarn? Plastic strips, copper wire, and raffia introduce tension and shine—key elements in mixed media art techniques. Yes, purists prefer wool. But innovation often begins where tradition loosens its grip.
DIY Chemistry: Creating Unique Effects with Household Materials
DIY chemistry isn’t just for science fairs. In fact, some of the most compelling textures in mixed media art techniques come straight from your kitchen.
Coffee & Tea Staining
Most tutorials insist you need specialty inks for a vintage look. Not true. Brew strong coffee or black tea, brush it over paper, then blot for organic variation. For gradients, dip only one edge and let capillary action (how liquid travels through fibers) do the work. Melted candle wax acts as a resist, blocking pigment for aged “found letter” vibes.
Salt & Alcohol Reactions
While paint is wet, sprinkle coarse salt to absorb moisture and create crystalline bursts. Drop rubbing alcohol onto watercolor or acrylic ink for fractal-like blooms (tiny branching patterns that look algorithmic). Some argue this is unpredictable. Exactly—that’s the magic.
Natural Pigments
Turmeric, paprika, spinach, beets, even soil—each yields earthy dyes. Pro tip: add a splash of vinegar to help set plant-based color. Imperfect? Sure. But perfection is overrated.
Your next masterpiece starts the moment you decide to experiment. Creative blocks fade when you swap predictability for play. By blending digital tools, recycled finds, and paint-splattered classics, you unlock bolder ideas, deeper expression, and unmistakable style. The real win? Confidence. Each experiment sharpens your instincts and expands your creative range.
Try:
- Combine circuit boards with acrylic washes
- Layer coffee stains over ink sketches
- Test mixed media art techniques on scrap wood
These small risks deliver big rewards: fresh textures, unexpected color stories, and work that feels undeniably yours. Pick one, gather your materials, and begin today. Growth loves action.
Keep Creating Without Limits
You came here looking for fresh inspiration, practical techniques, and creative ways to elevate your craft—and now you have a clearer path forward. From trending textures to mixed media art techniques, you’ve seen how layering materials, experimenting with tools, and rethinking everyday supplies can transform your artistic process.
If you’ve ever felt stuck staring at the same supplies, unsure how to make your work stand out, that frustration ends here. The right techniques and a little creative courage can turn ordinary projects into standout pieces that truly express your style.
Now it’s your move. Choose one new technique, test one unexpected material, and start your next project today. If you want step-by-step ideas, fresh trend updates, and clever DIY material hacks trusted by a growing community of passionate creators, explore more guides and start crafting with confidence. Your next breakthrough piece is waiting—go make it.
 Zayric Xenvale is the kind of writer who genuinely cannot publish something without checking it twice. Maybe three times. They came to artistic expression styles through years of hands-on work rather than theory, which means the things they writes about — Artistic Expression Styles, Specialty Reads, LWMF Artisan Project Spotlights, among other areas — are things they has actually tested, questioned, and revised opinions on more than once.